Naval Postgraduate School OC3902
FUNDAMENTALS OF MAPPING, CHARTING, AND GEODESY
|
Lab3: ArcGIS Part-1 Lab
Exercise |
|
|
ArcView is one of the three functional product levels at which you can use ArcGIS Desktop. ArcView is a suite of three applications: ArcMap, ArcCatalog, and ArcToolbox. It is a powerful toolkit for mapping, reporting, and map-based analysis. The goal of this exercise is to give you a brief introduction to ArcView and its capabilities. You will examine ArcView by import from ArcMap projects. Please copy the directory lab3_ArcGIS1 with all the data files to your working directory from \\lrcapps\common$\OC3902\FY09Qtr1, and work in your own directory. |
|
Mapping from Exist ArcView Projects |
|
|
|
|
|
|
|
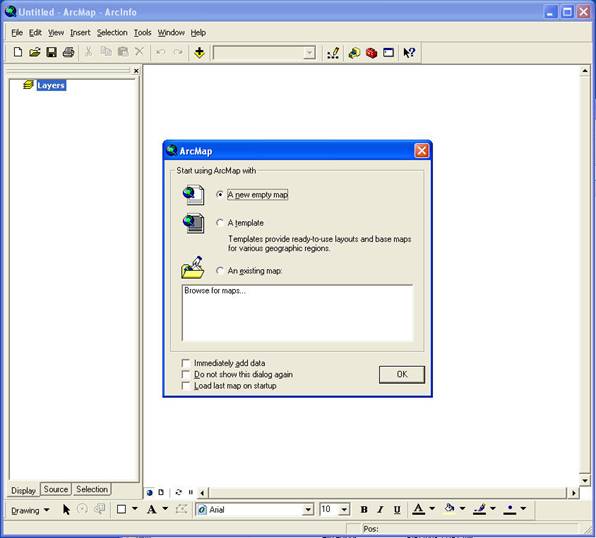
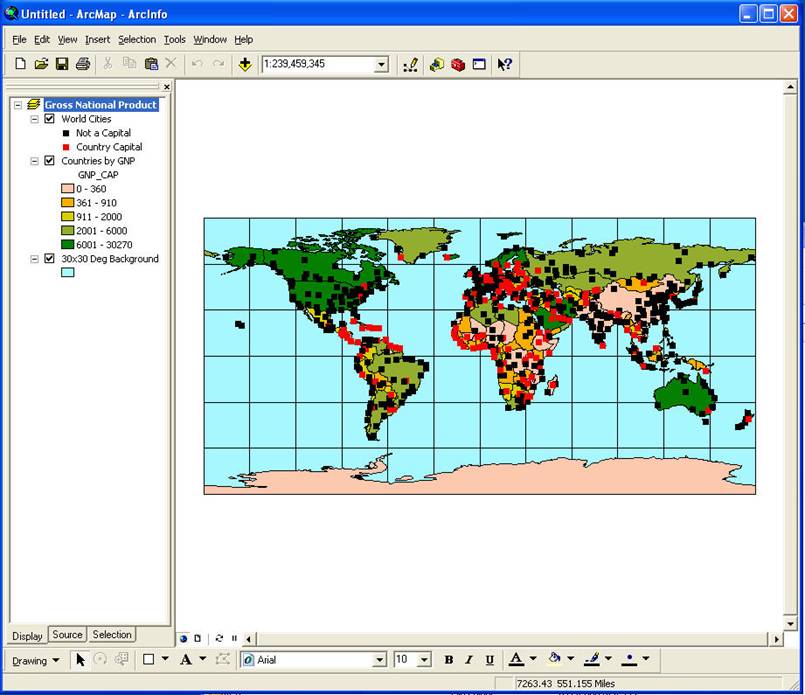
Click on: Start -> All Programs -> ArcGIS -> ArcMap
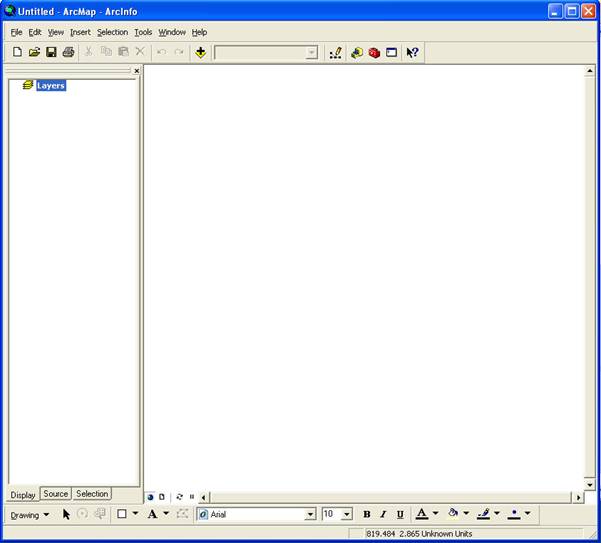
An ArcMap window will open, check “a new empty map”, then click “Ok”. Now you get an empty map.
At the top of the ArcMap window, there is a Main menu bar with four pull-down menus: File, Edit, View, Insert, Selection, Tool, Window, and Help. The main menu bar always on.
Below the menu bar is the Standard bar. There are some other tool bars which you can chose “on” or “off”, from “View” (in main menu bar). Click View , check Tool Bars, then select the bars which you like to open.
At the low left corner, there are four small symbols responding ‘data view’, ‘layout view’, ‘refresh view’ and ‘pause’. If your view is ‘layout view’, check the ‘data view’.
|
|
|
|
|
|
|
|
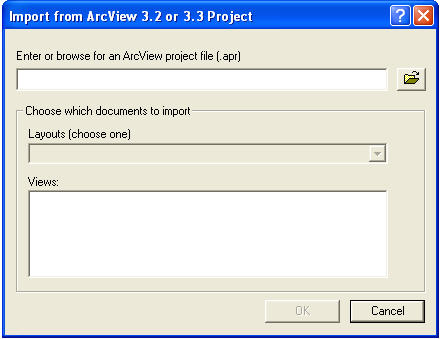
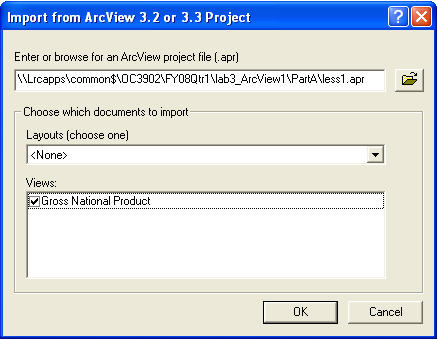
Click File of main bar, pull down to ‘Import from ArcView Project……’ to open “Import from ArcView 3.2 or 3.3 Project” Catalog .
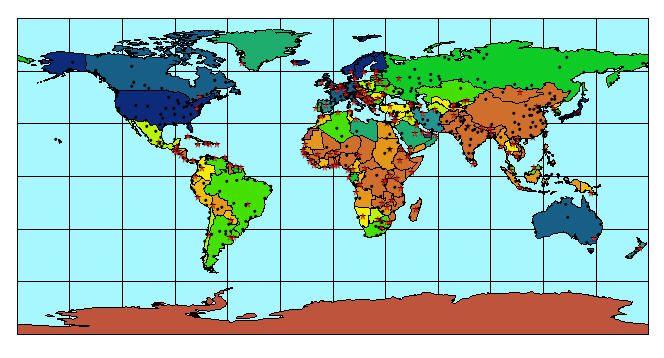
You can choose the project file (.apr) from data base, try to find ‘less1.apr’ data in lab3_ArcGIS1 from ‘Import from ArcView 3.2 or 3.3 Project’ Catalog and select it. Then select ‘Gross National Product’ on Views. Click ‘Ok’.
You will get the global Gross National Produce Map. |
|
|
|
|
|
|
|
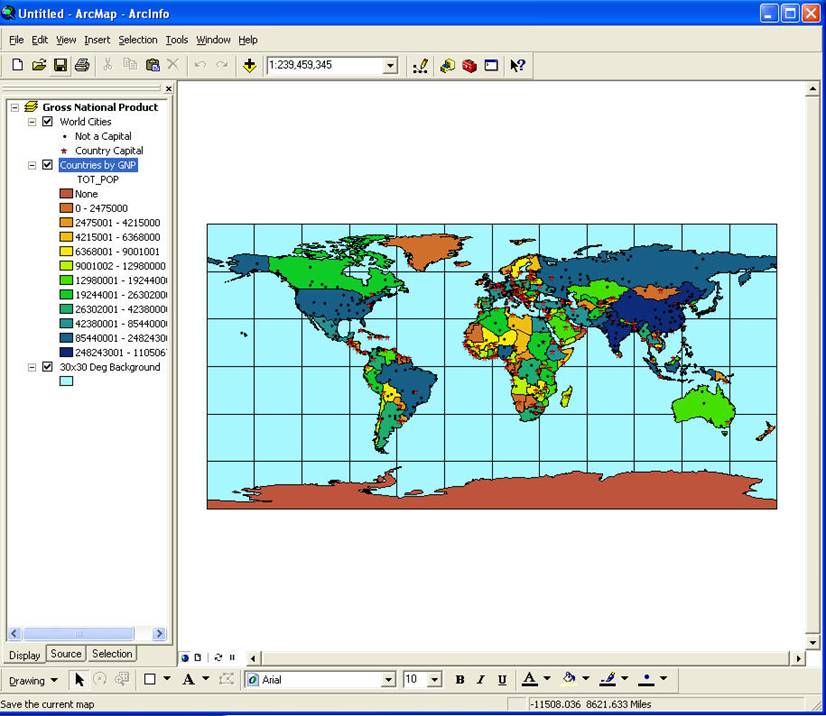
There are three levels (data files) in the data window (left side). The bottom level is ‘30x30 Deg Background’ , the middle is ‘Countries by GNP’ and the top level is ‘world Cities’. The higher level data will over-write the lower level data. You can check (uncheck) to display (not-display) these data.
|
|
|
|
|
|
|
|
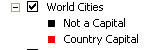
Cites are marked by square symbol, red for capital and black for non capital cities.
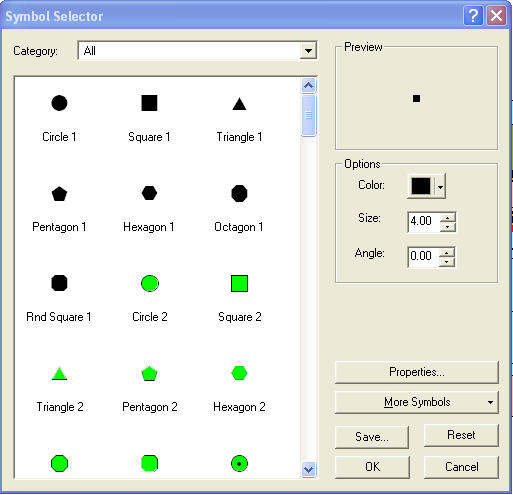
To change non capital cities symbol just double click on the symbol of ‘Not a Capital’ to open “Symbol Selector” Catalog, you can choose the symbol, color and size which you want. Also change ‘Country Capital’ symbol.
|
|
|
|
|
|
|
|
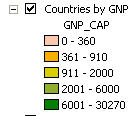
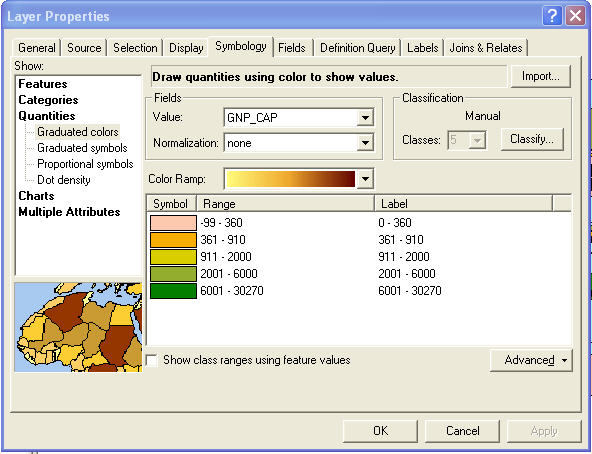
The middle level has five color levels
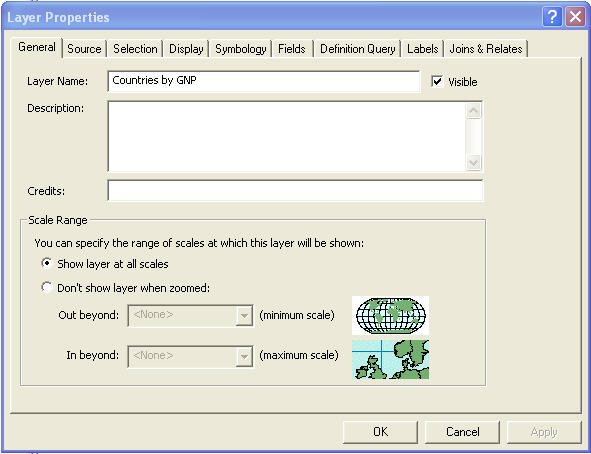
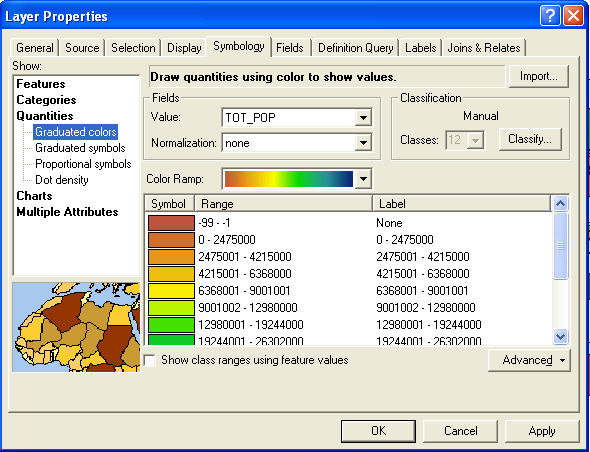
You can change the levels, color and the interval by right click on ‘Countries by GNP’, click ‘Properties…’ to open “Layer Properties” Catalog.
Click “Symbology” on the Layer Properties Catalog to open Layer Properties Catalog. If the Classes number in the Classification can not be changed (see the below picture the number 5 is gray color and on gray background), you have to refresh it by change ‘Normalization’ status from ‘<NONE>’ to other, then change back.
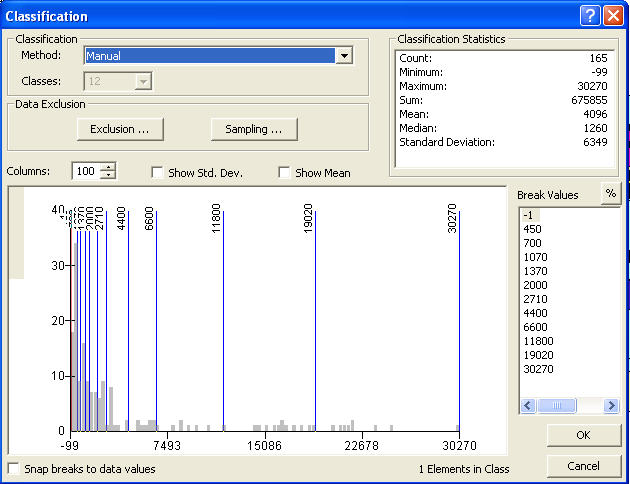
The Classes number 5 will be black on white background. Change the class number from 5 to 12. The number -99 indicate the data not available. It is better to define the first level as -99 to -1 (not data available). Click the “Classify…” button and correct the number in the Classification Catalog as: change the Method to “Natural Breaks (Jenks)” and change the first Break Values from 200 to -1. Than click ‘OK”.
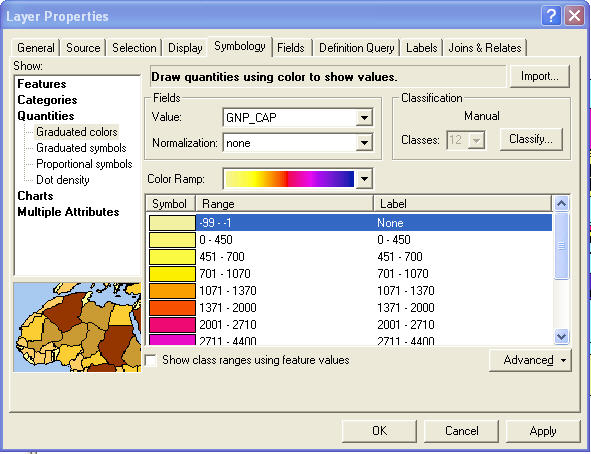
Change the label of first level from “-99- -1” to “None” by click the first level and change label.
Change the Color Ramp by the pull bar, then click Apply, if you satisfy the result, click ‘OK’ you will get the map.
|
|
|
|
|
|
|
|
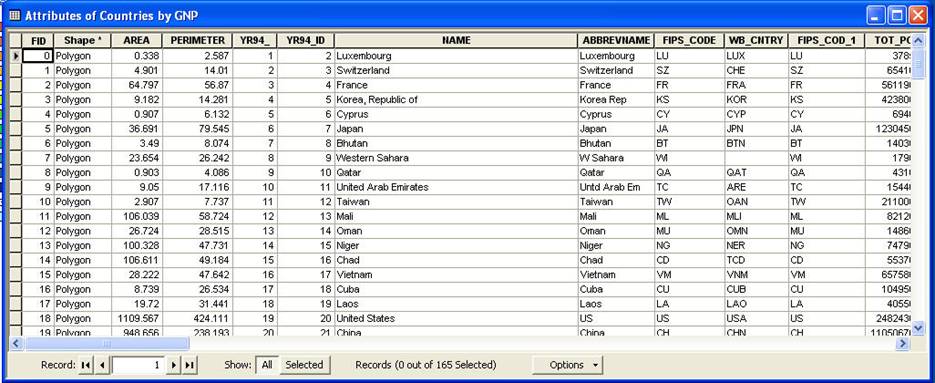
There are some other data of ‘countries by GNP’ in the data file. You can view all the data attribution information in the attribute table. Right click on ‘Countries by GNP’, click ‘Open Attribute Table’, the table shows all the attribution data.
To change the value “GNP_CAP” to others in ‘countries by GNP’ level, just right click on ‘Countries by GNP’, and change the Value from “GNP_CAP” to others in the Layer Properties Catalog as:
After you modified the first level range and label to -99 - -1 and None, than click Apply and Ok.
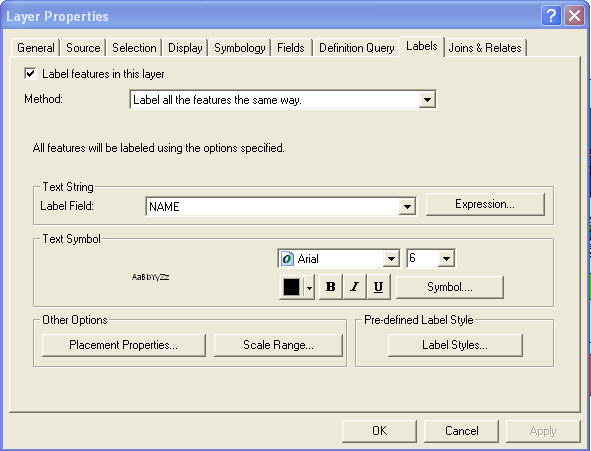
If you like put the country name on the map, you can do as follow: Right click on ‘Countries by GNP’ and pull to ‘Properties…’ to open Layer Properties Catalog, switch “Symbology” to “Labels”, mark “Label Features in this layer”, select method as “Label all the features the same way”, select Label Field as “NAME”, click “Symbol”, select the size, color in the Layer Properties Catalog.
Clisk “OK”, a map with country name will come.
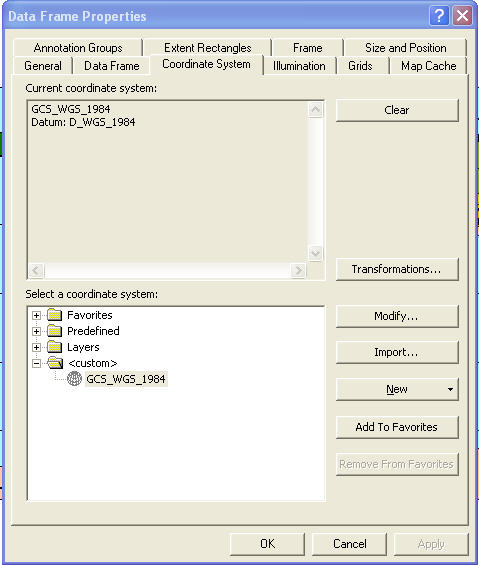
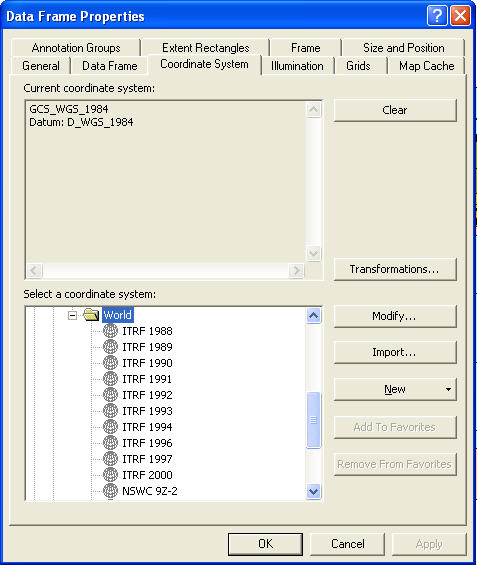
Change coordinate system: Right click on
Click on the “Coordinate System” -> click “Predefined” -> click “Geographic Coordinate Systems” -> “World”, then choose the coordinate system which you want.
|
|

Note: no
hand-in requirement.
(Back to "Labs List" page.)
Last Updated 20 Sep. 2008
POC: Peter Chu